


How to Install Acoustic Panels on Walls and Ceilings
Overview
Acoustic panels are an excellent option to improve the acoustics of a room, however how to install acoustic panels varies depending on the type of panel and whether you are installing them on a ceiling or on a wall.
On walls, acoustic panels are installed in 3 ways depending on the type of panel and whether you need to avoid damage to the wall or not:
- Screwing them to the wall
- Sticking them to the wall
- Or a combination of both
Peel and stick acoustic panels are installed by simply peeling the protective sheet from the back of the panel and sticking it directly to the wall. Other types of acoustic panels are installed using clips or construction glue suggested by the manufacturer.
On ceilings, acoustic panels usually require an existing dropped ceiling grid and are installed by dropping the panel into position on the existing grid. When old panels are present, push the old panel up and out of the grid and then replace it by the new one by dropping the new one in place. However, acoustic panels can also be screwed or stuck to the ceiling.
Whether for a classroom, home studio, office, or entertainment space, this comprehensive acoustic panel installation guide covers step by step installation instructions for the 6 following installation methods:
- Command strip method
- Z clip method
- Impaling clip method
- Adhesive method
- Peel and stick method
- Installing into an existing ceiling grid
We also cover general costs, tools, materials and tips for you to install acoustic panels on ceilings or walls.
Methods for Installing Acoustic Panels
There are 6 main methods for installing acoustic panels:
- Command strip method: for installing panels without damaging the walls
- Z clip method: allows repositioning the panels with minimal wall damage.
- Impaling clip method: when strong attachment is needed with superficial wall damage
- Adhesive method: attach panels permanently with strong bond
- Peel and stick method: the fastest way to install acoustic panels
- Installing into an existing ceiling grid
Each of them use different tools and materials and generate different levels of damage to the wall or ceiling, from no damage to holes being required.
Let’s dive into how we can install acoustic panels with each of these methods.
How to install acoustic panels without damaging walls?
Installing acoustic panels with command strips is the best way to hang acoustic panels without damaging walls. With the capability to hold a surprising amount of weight, command strips can hang lightweight acoustic panels in temporary or rental spaces where permanent installation methods are not suitable.
Alternative installation options that follow the same concept and installation process include using:
- Heavy duty double sided tape
- Self-adhesive velcro

How to install acoustic panels with the Command Strip Method?
- Choose command strips that are strong enough to hold the weight of your acoustic panel
- Wipe the installation surface with rubbing alcohol (not water or household cleaners)
- Separate the command strips and click the strips together
- Remove one side of liners of the strip and stick on the backside of the acoustic panel. Press firmly
- Remove remaining liners and press the panel with the command strips firmly against the wall for 30 seconds. Make sure the panel is straight by using a level for guidance.
- Peel the acoustic panel off the wall and press each command strip on the wall for 30 seconds
- Wait for 1 hour to allow the adhesive to build
- Clip the acoustic panel back in place
Cost and Time Consideration:
- Command Strips Costs: $3-$10 (USD) per pack, depending on size and type.
- Installation Time: 2-4 hours, depending on the number and size of panels.
Tools required:
- Level
- Rubbing alcohol
- Command strips
How to install acoustic panels with minimal damage to a wall?
Minimal wall damage refers to minor or superficial damage inflicted on a wall such as dents, scratches and scuff marks that don’t affect the structural integrity of the wall.
There are 2 methods to install acoustic panels with minimal damage to a wall:
- Z-clip method
- Impaling method
The Z-Clip method is an efficient and flexible way to install acoustic panels that allows for later adjustments or repositioning of the panels. To attach the Z-clips it uses #6 or #8 screws (0.13 and 0.16 inch respectively in size) which makes it the best way to install acoustic panels with minimal damage to a wall, however it requires a bit more measurements to put the clips in the right place.
Using screws is often considered a minimal form of wall damage, especially when compared to more invasive methods like drilling large holes
The Impaling clip method is a fast and straightforward way to install acoustic panels when you need a robust attachment. It consists in screwing or glueing the flat side of an impala clip to the wall and then protruding the pins into the acoustic panel to support the vertical weight. Additional adhesive between the panel and the wall can be applied, however, if you need to remove the acoustic panels (and the impaling clips), the damage will be superficial but noticeable.
How to install acoustic panels with the Z-Clip Method?
To install acoustic panels using Z clips you’ll need to:
- Choose appropriate Z- Clips: Z-Clips come in various sizes and designs. Make sure to choose Z clips that are suitable to hold your specific acoustic panels.
- Level: Hang the Z-clip level, using a straight-edge level and pencil to mark the location where you’ll install the Z-clip.
- Attach: Attach the Z-clips to the mounting surface, lining them up with your existing marks, and use a screw gun and screws to attach it.
- Clip: Clip the panel onto the Z-clip to hold the panel securely.
Cost and Time Consideration:
- Z-Clips Costs: $5-$10 (USD) per pair.
- Screws Costs: $1-$3 (USD) per pack.
- Installation Time: 4-6 hours, depending on the number and size of panels.
Tools and Materials Needed:
- Z-Clips
- Screws
- Screwdriver or power tool ( if using a power tool (keeping hands 6 inches (15.24 cm) away from moving parts).
- Level
- Pencil
- Safety Glasses
How to install acoustic panels with the Impaling Clip Method?
To install acoustic panels using Impaling clips you’ll need to:
- Prepare the Surface: Ensure the wall is clean and even. If uneven, sand the surface lightly.
- Mark the Location of the clips: Determine where the panels will go and mark the locations for the clips with a pencil. Keep in mind that clips are placed on corners or in the centre of the panel. Use a level to ensure the alignment is straight.
- Attach Impaling Clips to Wall: Using screws and a screwdriver (or screw gun), attach the impaling clips to the wall at the marked locations. The spikes on the impaling clips should be facing outward and the flat part of the clip in contact with the wall.
- Apply Adhesive: If extra bonding strength is desired, apply adhesive on the wall next to each clip. You can also apply some adhesive to the perimeter of the panel, about 2 inches from the edge.
- Position the Panel: Carefully align the panel with the impaling clips. Press the panel onto the clips so that the spikes penetrate into the back of the panel. The impaling action helps to grip the panel securely.
- Check Alignment: Make any necessary adjustments to ensure the panel is level and straight. Press firmly to ensure full engagement with the clips and contact with the adhesive.
- Allow Time for Adhesive to Cure: If adhesive was applied, follow the manufacturer’s instructions for cure time, usually between 1 and 24 hours.
- Repeat: Continue with the next panel, ensuring proper alignment and spacing.
Cost and Time Consideration:
- Impaling Clips Costs: $2-$5 (USD) each.
- Adhesive Costs (If Used): $5-$15 (USD).
- Safety glasses, screws and screwdriver ($10-$20 USD)
- Installation Time: 3-5 hours, depending on the number and size of panels.
Tools and Materials Needed:
- Impaling Clips
- Screws
- Screw Gun or Screwdriver
- Level
- Pencil
- Adhesive (optional, such as Premium Polyurethane Construction Adhesive)
- Safety Glasses
Other Methods for Installing Acoustic Panels
Adhesive Method
This method provides a strong and lasting bond for acoustic panels by using construction adhesive to glue the panels permanently to the wall.
How to install acoustic panels using the adhesive method:

Sand the Surface: Use high-grit sandpaper to sand the area where you will be mounting your acoustic panel. This will help to even the surface and increase the adhesive’s bonding power. After sanding, clean any dust and debris.
- Level and Mark: Use a straight-edge level and a pencil to mark the area where you’ll be placing your panel to make sure your panels are straight after you hang them.
- Install Levelling Brackets: Screw levelling brackets onto the mounting surface (about 3-4 feet or 91-121 cm from the floor) to help your panels lay correctly.
- Apply Adhesive: Apply adhesive to the back of the acoustic panel. Start by adding a line of adhesive to the perimeter of the panel about two inches (5 cm) from the edge. Then, make an “X” with the adhesive to divide the rectangle into four equal sections. Put a 2 to 4-inch (5 to 10cm) circle of adhesive in each of these sections.
- Install the Panel: Carefully place the panel onto the wall, aligning it with your pencil marks. Press firmly for 30 seconds to ensure even adhesion.
- Allow Adhesive to Cure: Leave the panel in place for about a day (or according to the adhesive manufacturer’s instructions) to allow the adhesive to fully cure and bond.
- Repeat for Additional Panels: Continue with the remaining panels, ensuring consistent alignment and spacing.
Cost and Time Consideration:
- Adhesive Costs: $5-$15 (USD) per tube, depending on brand and quantity.
- Installation Time: 4-6 hours, depending on the number and size of panels, plus curing time.
Tools and Materials Needed:
- Construction adhesive (such as Premium Polyurethane Construction Adhesive)
- Levelling brackets
- High-grit sandpaper
- Cleaning cloth
- Level
- Pencil
Peel and Stick Method
Peel and stick acoustic panels are self-adhesive sound-absorbing panels that can be easily applied to walls, ceilings, or other surfaces to improve the acoustic properties of a room.
The Peel and Stick method covers how to install this specific type of acoustic panel.
The “peel and stick” feature refers to their convenient installation process where you can simply peel off the backing and stick the panels onto a wall or ceiling without the need for additional adhesives, tools or materials
To install acoustic panels with the peel and stick method:
- Prepare the Surface: Ensure the wall is clean, even and dry.
- Mark the Location of the panels: figure out where the panels will go and mark the locations on the wall with a pencil. Use a level to ensure the alignment is straight.
- Remove the peel from the backside of the panel
- Stick the panel to the wall or ceiling: carefully align and stick the panel in the marked position. Keep in mind that once the panel touches the wall it will be very difficult to move.
- Press firmly to ensure the adhesive sticks to the wall
- Repeat: Continue with the next panel, ensuring proper alignment and spacing.
Cost and Time Consideration:
- No installation cost
- Installation Time: 1-2 hours depending on the number of panels
Tools and Materials Needed:
- Cleaning cloth
- Level
- Pencil
How to Install Acoustic Panels on the Ceiling into an existing Grid
To install acoustic panels into an existing grid:
- Buy the correct panels: measure the spaces within your grid and purchase panels that fit.
- Push the old ceiling tile up and out of the grid.
- Slide your new acoustic ceiling tile up through the newly opened gap before gently dropping it into position.

If you have a dropped ceiling, the layout of your acoustic ceiling panels will almostcertainly be determined by the spacing of the joists. In that case you should find out more about what acoustic ceiling tiles are and how to install them.
How to Mount Acoustic Panels: Tips Before Installation
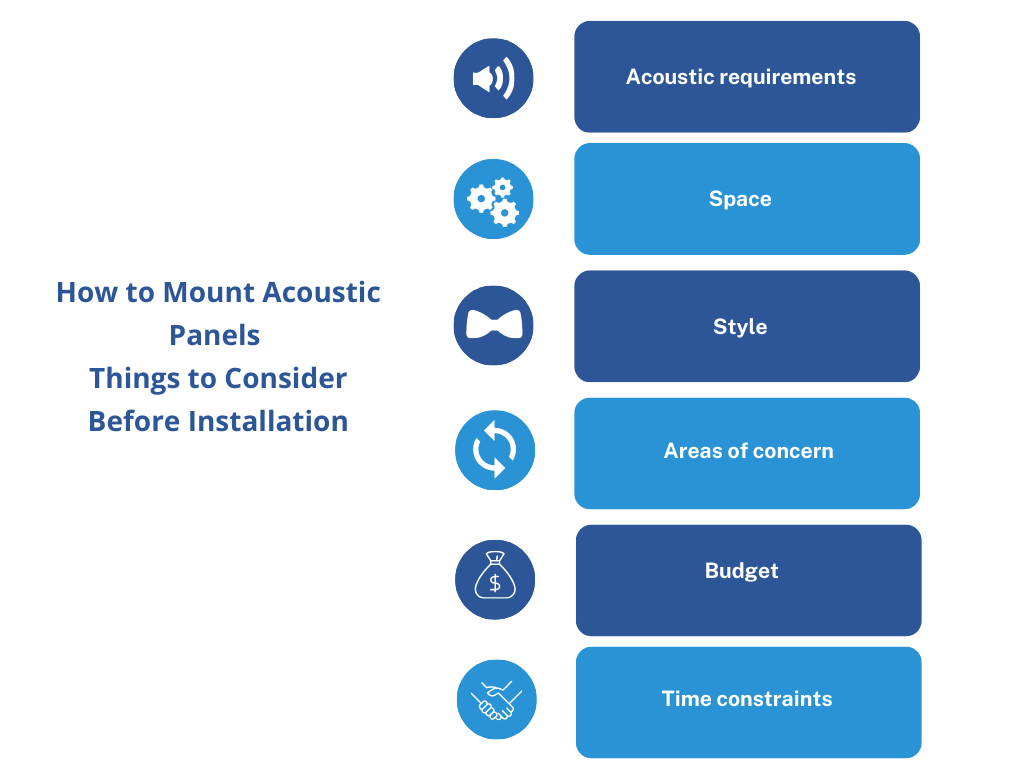
Learning how to stick acoustic panels to the wall and ceiling need not be so difficult. Here’s a quick overview of things to consider before you put up your panels:
- Acoustic requirements: Mounting acoustic panels is excellent for dampening sound, but foam or fabric panels aren’t dense enough for soundproofing. Be sure that you understand what acoustic panels are and if they’re the right solution before installation.
- Space: How and where to place acoustic panels depends greatly on the space available to you. If you’re renting, we recommend a non-destructive installation method such as 3M command strips for wall panels, and simple, drop-in solutions for ceilings.
- Style: Acoustic panels are as much a design element as the colours on the walls and the furniture on the floor. Choose colours and styles that suit the decor of the room.
- Areas of concern: Some areas are more prone to echoing than others. Be sure to identify these spots before installing your acoustic foam or fabric panels.
- Budget: Set your budget early so you can find a solution to match. Systems for managing the acoustics in your building range from expensive, hanging acoustic clouds, to low-cost suspended tiles and peel and stick wall panels.
Time constraints: If you’re short on time, you’ll want to choose an installation method that can be completed in a few hours. Installing brackets and grid systems can create striking results, but these processes take a lot longer than simply sticking a panel to the wall.